Frannleman (talk | contribs) No edit summary |
(→Modifications: Added ZF-4) Tag: Visual edit |
||
| (17 intermediate revisions by 7 users not shown) | |||
| Line 1: | Line 1: | ||
{{Gun |
{{Gun |
||
|id=47 |
|id=47 |
||
| + | |History=The '''Fallschirmjägergewehr 42''' (or FG42) is a selective fire battle rifle developed by German arms manufacturer Rheinmetall, for use by German Fallschirmjäger [[Paratrooper|paratroopers]]. It is chambered in the powerful [[7.92x57 Mauser|7.92×57mm Mauser]] cartridge. |
||
| − | }} |
||
| − | |||
| − | ===Description=== |
||
| − | "The Fallschirmjägergewehr 42 is designed to fill a key niche where you both need a rifle and a light machinegun, but can only carry one. It has a 20 round magazine and is a formidable weapon in the hands of experienced soldiers." |
||
| − | |||
| − | ===History=== |
||
| − | The '''Fallschirmjägergewehr 42''' (or FG42) is a selective fire battle rifle developed by German arms manufacturer Rheinmetall, for use by German Fallschirmjäger [[Paratrooper|paratroopers]]. It is chambered in the powerful [[7.92x57 Mauser|7.92×57mm Mauser]] cartridge. |
||
Traditional paratrooper operations of the time required that armament be dropped separate of the troops, and paratroopers needed to locate supply drop crates that were deployed along with them, as their harnesses were incapable of supporting their weaponry on their person. This led to serious complications, most notably an operation in Crete, Greece, where German paratroopers armed with only handguns and frag grenades were unable to recover their supply crates and were subsequently obliterated shortly after landing. |
Traditional paratrooper operations of the time required that armament be dropped separate of the troops, and paratroopers needed to locate supply drop crates that were deployed along with them, as their harnesses were incapable of supporting their weaponry on their person. This led to serious complications, most notably an operation in Crete, Greece, where German paratroopers armed with only handguns and frag grenades were unable to recover their supply crates and were subsequently obliterated shortly after landing. |
||
| Line 15: | Line 9: | ||
It was also capable of select fire, and unique in that single shot made the receiver a closed bolt, making it more long range and accurate; whereas the full auto functioned as an open bolt. |
It was also capable of select fire, and unique in that single shot made the receiver a closed bolt, making it more long range and accurate; whereas the full auto functioned as an open bolt. |
||
It was also capable of equipping 2.5-3.7x optics which further complimented the single fire bolt; however this was more reserved towards elite paratroopers or earlier users who received the FG42 early in its production when it was more accessible. |
It was also capable of equipping 2.5-3.7x optics which further complimented the single fire bolt; however this was more reserved towards elite paratroopers or earlier users who received the FG42 early in its production when it was more accessible. |
||
| + | |Gameplay=Avaliable for German Paratroopers and German Infantry as a captured weapon. It is a LMG AR hybrid with descent accuracy and is not restricted to only walking when shooting the weapon unlike the standard machineguns with the only exception being the Johnson M1941 LMG. It is the only High caliber fully automatic weapon paratroopers can jump with that is currently in the game. Without modifications FG42 has the lowest rate of fire (ROF) compared to other LMGs and second lowest for submachineguns. This makes it a good fully automatic medium range combat weapon, but equipping only the Fast Trigger (633rpm) will make it have similar ROF to higher tier submachine guns and standard LMGs. It has decent hipfire accuracy. The aimed accuracy are accurate even though the smoke and pinhole sight makes it hard to track targets. It is the only machine gun that can equip a scope. |
||
| + | The weapon is a 3 Hit-Kill to Heavy Set Silver while stock. The Chrome Lined Barrel mod is recommended as it's cheap while offering no downsides. Using at least the s.S Patrone ammunition or the Heavy Bolt combined with Chrome Lined Barrel allows for 3 torso hit-kills for enemies who use Heavy Set Gold. |
||
| − | ===Gameplay=== |
||
| − | [[File:FG-42 Stats.png]] |
||
| + | The weapon's sights are rounded and small thus being obstructive and can easily lead you to losing the target in constant fire, especially due to the muzzle flash from shooting. The sway is almost nonexistant, but the recoil is a bit high compared to SMGs but lower than most LMGs. The entire style of the weapon is to be aggressive, don't be afraid to get in the enemies face. Because this weapon will be an inhumane tool of destruction in the closest combat once upgraded and utilized with skill and experience. One can easily kill enough enemies to run out of ammo with the right use of this weapon. |
||
| − | Available only for German [[Paratrooper|paratroopers]]. It is a LMG AR hybrid with low accuracy, but it is the only High caliber fully automatic weapon paratroopers can jump with that is currently in the game. The FG42's high rate of fire (ROF) makes it a very powerful close-to-medium range combat weapon, but movement restriction during fire can be deadly to the user. Due to high recoil and a very small magazine, burst fire is the most efficient way of using this weapon. Currently the most expensive weapon in the game at 298,200 credits. It has very bad hip fire accuracy so the strong grip medal is highly recommended for offensive or CQC. The aimed accuracy makes it useless beyond 80+ meters unless it is modified for increased precision. Even then in order to make it useful at extreme ranges makes recoil a problem. |
||
| + | The reload time is faster than Tier-2 SMG but slower than tier-1. |
||
| − | This weapon can be hip fired, but only while walking, putting you at a disadvantage in open areas. Crouch or get prone to help control the difficult recoil. This is very useful when approaching corners or inside buildings. |
||
| + | == Tips == |
||
| − | The recoil is a hefty vertical left kick. Pulling down to the right on the mouse during full auto fire is heavily recommended and can (with the precision setup) make you effective in full auto firing up to 40 meters if used correctly. The weapon can also be upgraded to deal a 3 hit kill at the maximum damage if the damage chart is correct. |
||
| + | The best way to utilize this weapon is by being aggressive. Flank and use cover very often. Open engagements can be the cause of your death with this type of weapon. You will run out of ammo extremely quickly in a firefight, so put cover in between you and the enemy as much as possible. It is best to single shot the weapon in anything past 30m+ as the recoil can be quite difficult to deal with when you first use it. However after learning the recoil pattern and upgrading the accuracy you can (as mentioned) put multiple rounds in burst fire up to 60m and higher with the correct technique. |
||
| − | The weapon's sights are rounded and small thus being obstructive and can easily lead you to losing the target in constant fire, especially due to the dust of rounds or just firing. The sway is also very high making it even less useful at range. The entire style of the weapon is to be aggressive, don't be afraid to get in the enemies face. Because this weapon will be an inhumane tool of destruction in the closest combat once upgraded and utilized with skill and experience. One can easily kill enough enemies to run out of ammo with the right use of this weapon. |
||
| + | Try to prioritize targets, kill the best/most dangerous players first in CQC combat. The only matchable close combat weapon is the [[Johnson M1941 LMG|Johnson]] when upgraded for RoF. Example for a priority situation: say you land on a roof and walk down the stairs. There are 2 snipers scoping through windows and a rifleman with an [[M1 Garand]] also looking through the window. Kill the rifleman first, then the 2 snipers. As the snipers tend to have little reaction time and by the time they realize what has happened, you can put all 3 of them down in bursts. This weapon excels at this play style. |
||
| − | The reload time is slower than the [[M1 Garand|M1 Garand]], but seems SLIGHTLY faster than the [[M1918A2 Automatic Rifle|M1918 BAR]] and on par with the [[Gewehr 43|Gewehr 43]]. Making it average for its class (not confirmed just yet, no statistics on this makes it difficult). |
||
| − | ===Tips=== |
||
| − | The best way to utilize this weapon is by being aggressive. Flank and use cover very often. Open engagements can be the cause of your death with this type of weapon. You will run out of ammo extremely quickly in a firefight, so put cover in between you and the enemy as much as possible. If used correctly it is the best CQC full auto firearm as it is faster firing and faster to draw than other Machine guns in comparison (other than the [[M1918A2|M1918 BAR]]) at CQC combat. However, it still has the worst firefight possibility in open, medium and long range combat. It is best to single shot the weapon in anything past 30m+ as the recoil can be quite difficult to deal with when you first use it. However after learning the recoil pattern and upgrading the accuracy you can (as mentioned) put multiple rounds in burst fire up to 60m and higher with the right technique. |
||
| + | It has low spare ammo (140). Which describes this weapons 'peak, shoot, retreat.' offensive play style. You will find yourself finding an ammo crate, or wishing to die, much sooner than other paratrooper or infantry weapons. Of course, the best option is to pick up a weapon in the heat of combat. Try to avoid making medium to long range shots after reaching your last clip to save on a person in CQC. NEVER use this weapon for suppressive fire like other LMGs or you will run out of ammo faster than a [[MG42]] with one clip and reloading every foot you take. |
||
| − | Try to prioritize targets, kill the best/most dangerous players first in CQC combat. The only matchable close combat weapon is the [[Thompson M1A1|Thompson]] when upgraded for RoF. Even then you still have the advantage in DPS when you put RoF and damage modifications on your FG42. Making you a monster at close range if you learn to aim or have a good strong grip medal. Example for a priority situation: say you land on a roof and walk down the stairs. There are 2 snipers scoping through windows and a rifleman with an [[M1 Garand]] also looking through the window. Kill the rifleman first, then the 2 snipers. As the snipers tend to have little reaction time and by the time they realize what has happened, you can put all 3 of them down in bursts. This weapon excels at this play style. |
||
| − | |||
| − | |||
| − | The ammo consumption on this weapon is ENORMOUS. Even more so that you are put at a disadvantage due to the low spare ammo (20/120 maximum). Which even further describes this weapons 'peak, shoot, retreat.' offensive play style. You will find yourself finding an ammo crate, or wishing to die, much sooner than other paratrooper or infantry weapons. Of course, the best option is to pick up a weapon in the heat of combat. Try to avoid making medium to long range shots after reaching your last clip to save on a person in CQC. NEVER use this weapon for suppressive fire like other LMGs or you will run out of ammo faster than a [[MG42]] with one clip and reloading every foot you take. |
||
Surprise, kill, flank, kill more. That's all that needs to be said for the strategy of this firearm. |
Surprise, kill, flank, kill more. That's all that needs to be said for the strategy of this firearm. |
||
| + | }} |
||
| + | = Modifications = |
||
| − | ==Specialist Ribbon== |
||
| + | {| class="wikitable" |
||
| + | ! |
||
| + | !Default |
||
| + | ![[s.S. Patrone#Semi-Automatic Rifles|s.S.Patrone]] |
||
| + | ![[Anschusspatrone s.S.#Semi-Automatic Rifles|Anschusspatrone s.S.]] |
||
| + | ![[S.m.K.Hart#Semi-Automatic Rifles|S.m.K.Hart]] |
||
| + | ![[Field Adjusted Sights#Machine Gun|Field Adjusted Sights]] |
||
| + | ![[ZF-4]] (T-Post) |
||
| + | ![[Field Trigger Job#Machine Gun|Field Trigger Job]] |
||
| + | ![[Fast Trigger]] |
||
| + | ![[Heavy Bolt#Machine Guns|Heavy Bolt]] |
||
| + | ![[Heavy Spring#Machine Gun|Heavy Spring]] |
||
| + | ![[Lightened Spring#Machine Gun|Lightened Spring]] |
||
| + | ![[Stainless Steel Barrel#Machine Guns|Stainless Steel Barrel]] |
||
| + | ![[Chrome Lined Barrel#Machine Gun|Chrome Lined Barrel]] |
||
| + | ![[Könich FJ-S]] |
||
| + | |- |
||
| + | !Image |
||
| + | | |
||
| + | |[[File:WA 24.png|100x100px|link=http://heroesandgenerals.gamepedia.com/File:WA_24.png]] |
||
| + | |[[File:WA 26.png|100x100px|link=http://heroesandgenerals.gamepedia.com/File:WA_26.png]] |
||
| + | |[[File:WA 51.png|100x100px|link=http://heroesandgenerals.gamepedia.com/File:WA_51.png]] |
||
| + | |[[File:WM PS 5.png|100x100px|link=http://heroesandgenerals.gamepedia.com/File:WM_PS_5.png]] |
||
| + | |[[image:ZF-4.png|100px|link=https://heroesandgenerals.fandom.com/wiki/File:ZF-4.png]] |
||
| + | |[[File:WM T 5.png|100x100px|link=http://heroesandgenerals.gamepedia.com/File:WM_T_5.png]] |
||
| + | |[[File:WM T 6.png|100x100px]] |
||
| + | |[[File:WM I 1.png|100x100px|link=http://heroesandgenerals.gamepedia.com/File:WM_I_1.png]] |
||
| + | |[[File:WM I 4.png|100x100px|link=http://heroesandgenerals.gamepedia.com/File:WM_I_4.png]] |
||
| + | |[[File:WM I 5.png|100x100px|link=http://heroesandgenerals.gamepedia.com/File:WM_I_5.png]] |
||
| + | |[[File:WM B 2.png|100x100px|link=http://heroesandgenerals.gamepedia.com/File:WM_B_2.png]] |
||
| + | |[[File:WM B 2.png|100x100px|link=http://heroesandgenerals.gamepedia.com/File:WM_B_2.png]] |
||
| + | |[[File:WM B 8.png|100x100px]] |
||
| + | |- |
||
| + | !Cost per shot |
||
| + | |{{#expr: {{PriceCreditsAmmoShot|id=23}} }}{{Credits}} (Ammo) |
||
| + | |{{#expr: {{PriceCreditsAmmoShot|id=24}} }}{{Credits}} |
||
| + | |{{#expr: {{PriceCreditsAmmoShot|id=26}} }}{{Credits}} |
||
| + | |{{#expr: {{PriceCreditsAmmoShot|id=51}} }}{{Credits}} |
||
| + | |{{#expr: {{PriceCreditsModsShot|id=89}} }}{{Credits}} |
||
| + | |{{#expr:{{PriceCreditsModsShot|id=91}}}}{{Credits}} |
||
| + | |{{#expr: {{PriceCreditsModsShot|id=90}} }}{{Credits}} |
||
| + | |{{#expr: {{PriceCreditsModsShot|id=52}} }}{{Credits}} |
||
| + | |{{#expr: {{PriceCreditsModsShot|id=85}} }}{{Credits}} |
||
| + | |{{#expr: {{PriceCreditsModsShot|id=86}} }}{{Credits}} |
||
| + | |{{#expr: {{PriceCreditsModsShot|id=88}} }}{{Credits}} |
||
| + | |{{#expr: {{PriceCreditsModsShot|id=83}} }}{{Credits}} |
||
| + | |{{#expr: {{PriceCreditsModsShot|id=84}} }}{{Credits}} |
||
| + | |{{#expr: {{PriceCreditsModsShot|id=48}} }}{{Credits}} |
||
| + | |- |
||
| + | !Field Maintenance Load |
||
| + | |{{MaintenanceLoadWeapon|id=47}}s (Weapon) |
||
| + | |{{MaintenanceLoadWeaponAmmo|id=24}}s |
||
| + | |{{MaintenanceLoadWeaponAmmo|id=26}}s |
||
| + | |{{MaintenanceLoadWeaponAmmo|id=51}}s |
||
| + | |{{MaintenanceLoadMods|id=89}}s |
||
| + | |{{MaintenanceLoadMods|id=91}}s |
||
| + | |{{MaintenanceLoadMods|id=90}}s |
||
| + | |{{MaintenanceLoadMods|id=52}}s |
||
| + | |{{MaintenanceLoadMods|id=85}}s |
||
| + | |{{MaintenanceLoadMods|id=86}}s |
||
| + | |{{MaintenanceLoadMods|id=88}}s |
||
| + | |{{MaintenanceLoadMods|id=83}}s |
||
| + | |{{MaintenanceLoadMods|id=84}}s |
||
| + | |{{MaintenanceLoadMods|id=48}}s |
||
| + | |- |
||
| + | !Damage Near |
||
| + | | {{HeavySetDamage|damage={{#expr: {{WeaponAmmoStats|id=23|category=damagenear}} * {{WeaponMultipliers|id=148|category=damagenear}}}} }} |
||
| + | | {{HeavySetDamage|damage={{#expr: {{WeaponAmmoStats|id=24|category=damagenear}} * {{WeaponMultipliers|id=148|category=damagenear}}}} }} |
||
| + | | {{HeavySetDamage|damage={{#expr: {{WeaponAmmoStats|id=26|category=damagenear}} * {{WeaponMultipliers|id=148|category=damagenear}}}} }} |
||
| + | | {{HeavySetDamage|damage={{#expr: {{WeaponAmmoStats|id=51|category=damagenear}} * {{WeaponMultipliers|id=148|category=damagenear}}}} }} |
||
| + | | |
||
| + | | |
||
| + | | |
||
| + | | |
||
| + | | {{HeavySetDamage|damage={{#expr: {{WeaponAmmoStats|id=23|category=damagenear}} * {{WeaponMultipliers|id=148|category=damagenear}} * {{WeaponModMultipliers|id=85|category=damagenear}}}} }} |
||
| + | | |
||
| + | | |
||
| + | | |
||
| + | | {{HeavySetDamage|damage={{#expr: {{WeaponAmmoStats|id=23|category=damagenear}} * {{WeaponMultipliers|id=148|category=damagenear}} * {{WeaponModMultipliers|id=84|category=damagenear}}}} }} |
||
| + | | |
||
| + | |- |
||
| + | !Damage Far |
||
| + | | {{HeavySetDamage|damage={{#expr: {{WeaponAmmoStats|id=23|category=damagefar}} * {{WeaponMultipliers|id=148|category=damagefar}}}} }} |
||
| + | | {{HeavySetDamage|damage={{#expr: {{WeaponAmmoStats|id=24|category=damagefar}} * {{WeaponMultipliers|id=148|category=damagefar}}}} }} |
||
| + | | {{HeavySetDamage|damage={{#expr: {{WeaponAmmoStats|id=26|category=damagefar}} * {{WeaponMultipliers|id=148|category=damagefar}}}} }} |
||
| + | | {{HeavySetDamage|damage={{#expr: {{WeaponAmmoStats|id=51|category=damagefar}} * {{WeaponMultipliers|id=148|category=damagefar}}}} }} |
||
| + | | |
||
| + | | |
||
| + | | |
||
| + | | |
||
| + | | |
||
| + | | |
||
| + | | |
||
| + | | |
||
| + | | |
||
| + | | |
||
| + | |- |
||
| + | !Near Range |
||
| + | |{{#expr: {{WeaponAmmoStats|id=23|category=rangenear}} * {{WeaponMultipliers|id=148|category=rangenear}}round2}} |
||
| + | |{{#expr: {{WeaponAmmoStats|id=24|category=rangenear}} * {{WeaponMultipliers|id=148|category=rangenear}}round2}} |
||
| + | |{{#expr: {{WeaponAmmoStats|id=26|category=rangenear}} * {{WeaponMultipliers|id=148|category=rangenear}}round2}} |
||
| + | |{{#expr: {{WeaponAmmoStats|id=51|category=rangenear}} * {{WeaponMultipliers|id=148|category=rangenear}}round2}} |
||
| + | | |
||
| + | | |
||
| + | | |
||
| + | | |
||
| + | |{{#expr: {{WeaponAmmoStats|id=23|category=rangenear}} * {{WeaponMultipliers|id=148|category=rangenear}} * {{WeaponModMultipliers|id=85|category=rangenear}}round2}} |
||
| + | | |
||
| + | |{{#expr: {{WeaponAmmoStats|id=23|category=rangenear}} * {{WeaponMultipliers|id=148|category=rangenear}} * {{WeaponModMultipliers|id=88|category=rangenear}}round2}} |
||
| + | | |
||
| + | |{{#expr: {{WeaponAmmoStats|id=23|category=rangenear}} * {{WeaponMultipliers|id=148|category=rangenear}} * {{WeaponModMultipliers|id=84|category=rangenear}}round2}} |
||
| + | |{{#expr: {{WeaponAmmoStats|id=23|category=rangenear}} * {{WeaponMultipliers|id=148|category=rangenear}} * {{WeaponModMultipliers|id=48|category=rangenear}}round2}} |
||
| + | |- |
||
| + | !Far Range |
||
| + | |{{#expr: {{WeaponAmmoStats|id=23|category=rangefar}} * {{WeaponMultipliers|id=148|category=rangefar}}round2}} |
||
| + | |{{#expr: {{WeaponAmmoStats|id=24|category=rangefar}} * {{WeaponMultipliers|id=148|category=rangefar}}round2}} |
||
| + | |{{#expr: {{WeaponAmmoStats|id=26|category=rangefar}} * {{WeaponMultipliers|id=148|category=rangefar}}round2}} |
||
| + | |{{#expr: {{WeaponAmmoStats|id=51|category=rangefar}} * {{WeaponMultipliers|id=148|category=rangefar}}round2}} |
||
| + | | |
||
| + | | |
||
| + | | |
||
| + | | |
||
| + | |{{#expr: {{WeaponAmmoStats|id=23|category=rangefar}} * {{WeaponMultipliers|id=148|category=rangefar}} * {{WeaponModMultipliers|id=85|category=rangefar}}round2}} |
||
| + | | |
||
| + | |{{#expr: {{WeaponAmmoStats|id=23|category=rangefar}} * {{WeaponMultipliers|id=148|category=rangefar}} * {{WeaponModMultipliers|id=88|category=rangefar}}round2}} |
||
| + | | |
||
| + | |{{#expr: {{WeaponAmmoStats|id=23|category=rangefar}} * {{WeaponMultipliers|id=148|category=rangefar}} * {{WeaponModMultipliers|id=84|category=rangefar}}round2}} |
||
| + | |{{#expr: {{WeaponAmmoStats|id=23|category=rangefar}} * {{WeaponMultipliers|id=148|category=rangefar}} * {{WeaponModMultipliers|id=48|category=rangefar}}round2}} |
||
| + | |- |
||
| + | !Velocity |
||
| + | |{{#expr: {{WeaponAmmoStats|id=23|category=velocity}} * {{WeaponMultipliers|id=148|category=velocity}}round2}} |
||
| + | |{{#expr: {{WeaponAmmoStats|id=24|category=velocity}} * {{WeaponMultipliers|id=148|category=velocity}}round2}} |
||
| + | |{{#expr: {{WeaponAmmoStats|id=26|category=velocity}} * {{WeaponMultipliers|id=148|category=velocity}}round2}} |
||
| + | |{{#expr: {{WeaponAmmoStats|id=51|category=velocity}} * {{WeaponMultipliers|id=148|category=velocity}}round2}} |
||
| + | | |
||
| + | | |
||
| + | | |
||
| + | | |
||
| + | | |
||
| + | | |
||
| + | | |
||
| + | | |
||
| + | | |
||
| + | | |
||
| + | |- |
||
| + | !Conefire |
||
| + | | {{#expr: {{WeaponAmmoStats|id=23|category=conemod}} * {{WeaponMultipliers|id=148|category=conefire}} }} |
||
| + | | {{#expr: {{WeaponAmmoStats|id=24|category=conemod}} * {{WeaponMultipliers|id=148|category=conefire}} }} |
||
| + | | {{#expr: {{WeaponAmmoStats|id=26|category=conemod}} * {{WeaponMultipliers|id=148|category=conefire}} }} |
||
| + | | {{#expr: {{WeaponAmmoStats|id=51|category=conemod}} * {{WeaponMultipliers|id=148|category=conefire}} }} |
||
| + | | |
||
| + | | |
||
| + | | |
||
| + | | |
||
| + | | |
||
| + | | |
||
| + | | |
||
| + | | |
||
| + | | |
||
| + | | |
||
| + | |- |
||
| + | !Sway Stand Mode |
||
| + | | {{#expr: {{WeaponMultipliers|id=47|category=swaystandmode}} }} |
||
| + | | |
||
| + | | |
||
| + | | |
||
| + | | {{#expr: {{WeaponMultipliers|id=47|category=swaystandmode}} * {{WeaponModMultipliers|id=89|category=conestandmode}} }} |
||
| + | | |
||
| + | | |
||
| + | | |
||
| + | | |
||
| + | | |
||
| + | | |
||
| + | | {{#expr: {{WeaponMultipliers|id=47|category=swaystandmode}} * {{WeaponModMultipliers|id=83|category=conestandmode}} }} |
||
| + | | |
||
| + | | {{#expr: {{WeaponMultipliers|id=47|category=swaystandmode}} * {{WeaponModMultipliers|id=48|category=conestandmode}} }} |
||
| + | |- |
||
| + | !Sway Crouch Mode |
||
| + | | {{#expr: {{WeaponMultipliers|id=47|category=swaycrouchmode}} }} |
||
| + | | |
||
| + | | |
||
| + | | |
||
| + | | {{#expr: {{WeaponMultipliers|id=47|category=swaycrouchmode}} * {{WeaponModMultipliers|id=89|category=conecrouchmode}} }} |
||
| + | | |
||
| + | | |
||
| + | | |
||
| + | | |
||
| + | | |
||
| + | | |
||
| + | | {{#expr: {{WeaponMultipliers|id=47|category=swaycrouchmode}} * {{WeaponModMultipliers|id=83|category=conecrouchmode}} }} |
||
| + | | |
||
| + | | {{#expr: {{WeaponMultipliers|id=47|category=swaycrouchmode}} * {{WeaponModMultipliers|id=48|category=conecrouchmode}} }} |
||
| + | |- |
||
| + | !Sway Prone Mode |
||
| + | | {{#expr: {{WeaponMultipliers|id=47|category=swaypronemode}} }} |
||
| + | | |
||
| + | | |
||
| + | | |
||
| + | | {{#expr: {{WeaponMultipliers|id=47|category=swaypronemode}} * {{WeaponModMultipliers|id=89|category=conepronemode}} }} |
||
| + | | |
||
| + | | |
||
| + | | |
||
| + | | |
||
| + | | |
||
| + | | |
||
| + | | {{#expr: {{WeaponMultipliers|id=47|category=swaypronemode}} * {{WeaponModMultipliers|id=83|category=conepronemode}} }} |
||
| + | | |
||
| + | | {{#expr: {{WeaponMultipliers|id=47|category=swaypronemode}} * {{WeaponModMultipliers|id=48|category=conepronemode}} }} |
||
| + | |- |
||
| + | !Sway Aim Modifier |
||
| + | | {{#expr: {{WeaponMultipliers|id=47|category=swayprecisionmodifier}} }} |
||
| + | | |
||
| + | | |
||
| + | | |
||
| + | | {{#expr: {{WeaponMultipliers|id=47|category=swayprecisionmodifier}} * {{WeaponModMultipliers|id=89|category=coneaimmodifier}} }} |
||
| + | | |
||
| + | | |
||
| + | | |
||
| + | | |
||
| + | | |
||
| + | | |
||
| + | | {{#expr: {{WeaponMultipliers|id=47|category=swayprecisionmodifier}} * {{WeaponModMultipliers|id=83|category=coneaimmodifier}} }} |
||
| + | | |
||
| + | | {{#expr: {{WeaponMultipliers|id=47|category=swayprecisionmodifier}} * {{WeaponModMultipliers|id=48|category=coneaimmodifier}} }} |
||
| + | |- |
||
| + | !Cone Contraction Per Sec |
||
| + | | {{#expr: {{WeaponMultipliers|id=47|category=aimpenaltycontractionpersec}} }} |
||
| + | | |
||
| + | | |
||
| + | | |
||
| + | | {{#expr: {{WeaponMultipliers|id=47|category=aimpenaltycontractionpersec}} * {{WeaponModMultipliers|id=89|category=conecontractionpersec}} }} |
||
| + | | |
||
| + | | |
||
| + | | |
||
| + | | |
||
| + | | |
||
| + | | |
||
| + | | {{#expr: {{WeaponMultipliers|id=47|category=aimpenaltycontractionpersec}} * {{WeaponModMultipliers|id=83|category=conecontractionpersec}} }} |
||
| + | | |
||
| + | | {{#expr: {{WeaponMultipliers|id=47|category=aimpenaltycontractionpersec}} * {{WeaponModMultipliers|id=48|category=conecontractionpersec}} }} |
||
| + | |- |
||
| + | !Camera Recoil Up |
||
| + | |{{#expr: {{WeaponMultipliers|id=148|category=camerarecoilup}} * {{WeaponAmmoStats|id=23|category=recoilmod}} }} |
||
| + | |{{#expr: {{WeaponMultipliers|id=148|category=camerarecoilup}} * {{WeaponAmmoStats|id=24|category=recoilmod}} }} |
||
| + | |{{#expr: {{WeaponMultipliers|id=148|category=camerarecoilup}} * {{WeaponAmmoStats|id=26|category=recoilmod}} }} |
||
| + | |{{#expr: {{WeaponMultipliers|id=148|category=camerarecoilup}} * {{WeaponAmmoStats|id=51|category=recoilmod}} }} |
||
| + | | |
||
| + | | |
||
| + | |{{#expr: {{WeaponMultipliers|id=148|category=camerarecoilup}} * {{WeaponAmmoStats|id=23|category=recoilmod}} * {{WeaponModMultipliers|id=90|category=camerarecoilup}} }} |
||
| + | |{{#expr: {{WeaponMultipliers|id=148|category=camerarecoilup}} * {{WeaponAmmoStats|id=23|category=recoilmod}} * {{WeaponModMultipliers|id=52|category=camerarecoilup}} }} |
||
| + | |{{#expr: {{WeaponMultipliers|id=148|category=camerarecoilup}} * {{WeaponAmmoStats|id=23|category=recoilmod}} * {{WeaponModMultipliers|id=85|category=camerarecoilup}} }} |
||
| + | |{{#expr: {{WeaponMultipliers|id=148|category=camerarecoilup}} * {{WeaponAmmoStats|id=23|category=recoilmod}} * {{WeaponModMultipliers|id=86|category=camerarecoilup}} }} |
||
| + | | |
||
| + | | |
||
| + | | |
||
| + | |{{#expr: {{WeaponMultipliers|id=148|category=camerarecoilup}} * {{WeaponAmmoStats|id=23|category=recoilmod}} * {{WeaponModMultipliers|id=48|category=camerarecoilup}} }} |
||
| + | |- |
||
| + | !Camera Recoil Right |
||
| + | |{{#expr: {{WeaponMultipliers|id=148|category=camerarecoilright}} * {{WeaponAmmoStats|id=23|category=recoilmod}} }} |
||
| + | |{{#expr: {{WeaponMultipliers|id=148|category=camerarecoilright}} * {{WeaponAmmoStats|id=24|category=recoilmod}} }} |
||
| + | |{{#expr: {{WeaponMultipliers|id=148|category=camerarecoilright}} * {{WeaponAmmoStats|id=26|category=recoilmod}} }} |
||
| + | |{{#expr: {{WeaponMultipliers|id=148|category=camerarecoilright}} * {{WeaponAmmoStats|id=51|category=recoilmod}} }} |
||
| + | | |
||
| + | | |
||
| + | |{{#expr: {{WeaponMultipliers|id=148|category=camerarecoilright}} * {{WeaponAmmoStats|id=23|category=recoilmod}} * {{WeaponModMultipliers|id=90|category=camerarecoilright}} }} |
||
| + | |{{#expr: {{WeaponMultipliers|id=148|category=camerarecoilright}} * {{WeaponAmmoStats|id=23|category=recoilmod}} * {{WeaponModMultipliers|id=52|category=camerarecoilright}} }} |
||
| + | |{{#expr: {{WeaponMultipliers|id=148|category=camerarecoilright}} * {{WeaponAmmoStats|id=23|category=recoilmod}} * {{WeaponModMultipliers|id=85|category=camerarecoilright}} }} |
||
| + | |{{#expr: {{WeaponMultipliers|id=148|category=camerarecoilright}} * {{WeaponAmmoStats|id=23|category=recoilmod}} * {{WeaponModMultipliers|id=86|category=camerarecoilright}} }} |
||
| + | | |
||
| + | | |
||
| + | | |
||
| + | | |
||
| + | |- |
||
| + | !Camera Recoil Variance |
||
| + | |{{#expr: {{WeaponMultipliers|id=148|category=camerarecoilvariance}} * {{WeaponAmmoStats|id=23|category=recoilmod}} }} |
||
| + | |{{#expr: {{WeaponMultipliers|id=148|category=camerarecoilvariance}} * {{WeaponAmmoStats|id=24|category=recoilmod}} }} |
||
| + | |{{#expr: {{WeaponMultipliers|id=148|category=camerarecoilvariance}} * {{WeaponAmmoStats|id=26|category=recoilmod}} }} |
||
| + | |{{#expr: {{WeaponMultipliers|id=148|category=camerarecoilvariance}} * {{WeaponAmmoStats|id=51|category=recoilmod}} }} |
||
| + | | |
||
| + | | |
||
| + | |{{#expr: {{WeaponMultipliers|id=148|category=camerarecoilvariance}} * {{WeaponAmmoStats|id=23|category=recoilmod}} * {{WeaponModMultipliers|id=90|category=camerarecoilvariance}} }} |
||
| + | |{{#expr: {{WeaponMultipliers|id=148|category=camerarecoilvariance}} * {{WeaponAmmoStats|id=23|category=recoilmod}} * {{WeaponModMultipliers|id=52|category=camerarecoilvariance}} }} |
||
| + | |{{#expr: {{WeaponMultipliers|id=148|category=camerarecoilvariance}} * {{WeaponAmmoStats|id=23|category=recoilmod}} * {{WeaponModMultipliers|id=85|category=camerarecoilvariance}} }} |
||
| + | |{{#expr: {{WeaponMultipliers|id=148|category=camerarecoilvariance}} * {{WeaponAmmoStats|id=23|category=recoilmod}} * {{WeaponModMultipliers|id=86|category=camerarecoilvariance}} }} |
||
| + | | |
||
| + | | |
||
| + | | |
||
| + | | |
||
| + | |- |
||
| + | !Rate of Fire |
||
| + | |{{#expr: 1/{{WeaponMultipliers|id=148|category=recoiltime}} * 60 round2}} |
||
| + | | |
||
| + | | |
||
| + | | |
||
| + | | |
||
| + | | |
||
| + | |{{#expr: 1/({{WeaponMultipliers|id=148|category=recoiltime}} * {{WeaponModMultipliers|id=90|category=recoiltime}}) * 60 round2}} |
||
| + | |{{#expr: 1/({{WeaponMultipliers|id=148|category=recoiltime}} * {{WeaponModMultipliers|id=52|category=recoiltime}}) * 60 round2}} |
||
| + | |{{#expr: 1/({{WeaponMultipliers|id=148|category=recoiltime}} * {{WeaponModMultipliers|id=85|category=recoiltime}}) * 60 round2}} |
||
| + | |{{#expr: 1/({{WeaponMultipliers|id=148|category=recoiltime}} * {{WeaponModMultipliers|id=86|category=recoiltime}}) * 60 round2}} |
||
| + | |{{#expr: 1/({{WeaponMultipliers|id=148|category=recoiltime}} * {{WeaponModMultipliers|id=88|category=recoiltime}}) * 60 round2}} |
||
| + | | |
||
| + | | |
||
| + | |{{#expr: 1/({{WeaponMultipliers|id=148|category=recoiltime}} * {{WeaponModMultipliers|id=48|category=recoiltime}}) * 60 round2}} |
||
| + | |} |
||
| + | =Trivia= |
||
| − | {{CR Fallschirmjägergewehr 42 Specialist}} |
||
| − | ===Trivia=== |
||
The weapon is a type E model, which means it is the faster-firing brother of the type G but at reduced range with 900rpm. However in game, it is closer to the type G in terms of stats. With a slower ROF and damage going out to 200 meters before hitting its minimum. |
The weapon is a type E model, which means it is the faster-firing brother of the type G but at reduced range with 900rpm. However in game, it is closer to the type G in terms of stats. With a slower ROF and damage going out to 200 meters before hitting its minimum. |
||
| − | In-game, you can only carry |
+ | In-game, you can only carry 140 rounds total. With 20 being the first clip making your spare ammo at 120. However in reality the German paratroops were able to carry up to 160 rounds of ammo for this weapon with a specifically designed Bandoliers. Equaling out to 8 clips spare. With 20 already in the firearm, making the standard ammo carry amount settle at 180 rounds. |
| − | + | =Gallery= |
|
| − | <gallery lines=3 heights=150 widths=175 caption="FG42"> |
+ | <gallery lines="3" heights="150" widths="175" caption="FG42"> |
File:Fallshirmgewehr 42.jpg |
File:Fallshirmgewehr 42.jpg |
||
| − | File: |
+ | File:Fg42ingame.jpg |
| − | File: |
+ | File:Fg42sightsingame.jpg |
| + | File:FG42 Ausf. E new iron sights.jpg |
||
| + | File:FG42 Ausf. E Scoped.jpg |
||
| + | File:FG42 Ausf. E aiming down scope.jpg |
||
</gallery> |
</gallery> |
||
| − | + | =References= |
|
| − | <references/> |
+ | <references /> |
| − | {{ |
+ | {{MGNav}} |
{{GMWeaponsNav}} |
{{GMWeaponsNav}} |
||
[[Category:Weapons]] |
[[Category:Weapons]] |
||
| Line 67: | Line 364: | ||
[[pl:FG42 Ausf. E/pl]] |
[[pl:FG42 Ausf. E/pl]] |
||
[[pt:FG42/pt]] |
[[pt:FG42/pt]] |
||
| + | [[es:FG42 Ausf. E/es]] |
||
Latest revision as of 08:59, 18 September 2021
Description
| “ | The Fallschirmjägergewehr 42 is designed to fill a key niche where you both need a rifle and a light machinegun, but can only carry one. It has a 20 round magazine and is a formidable weapon in the hands of experienced soldiers. | ” |
| ― Heroes & Generals | ||
History
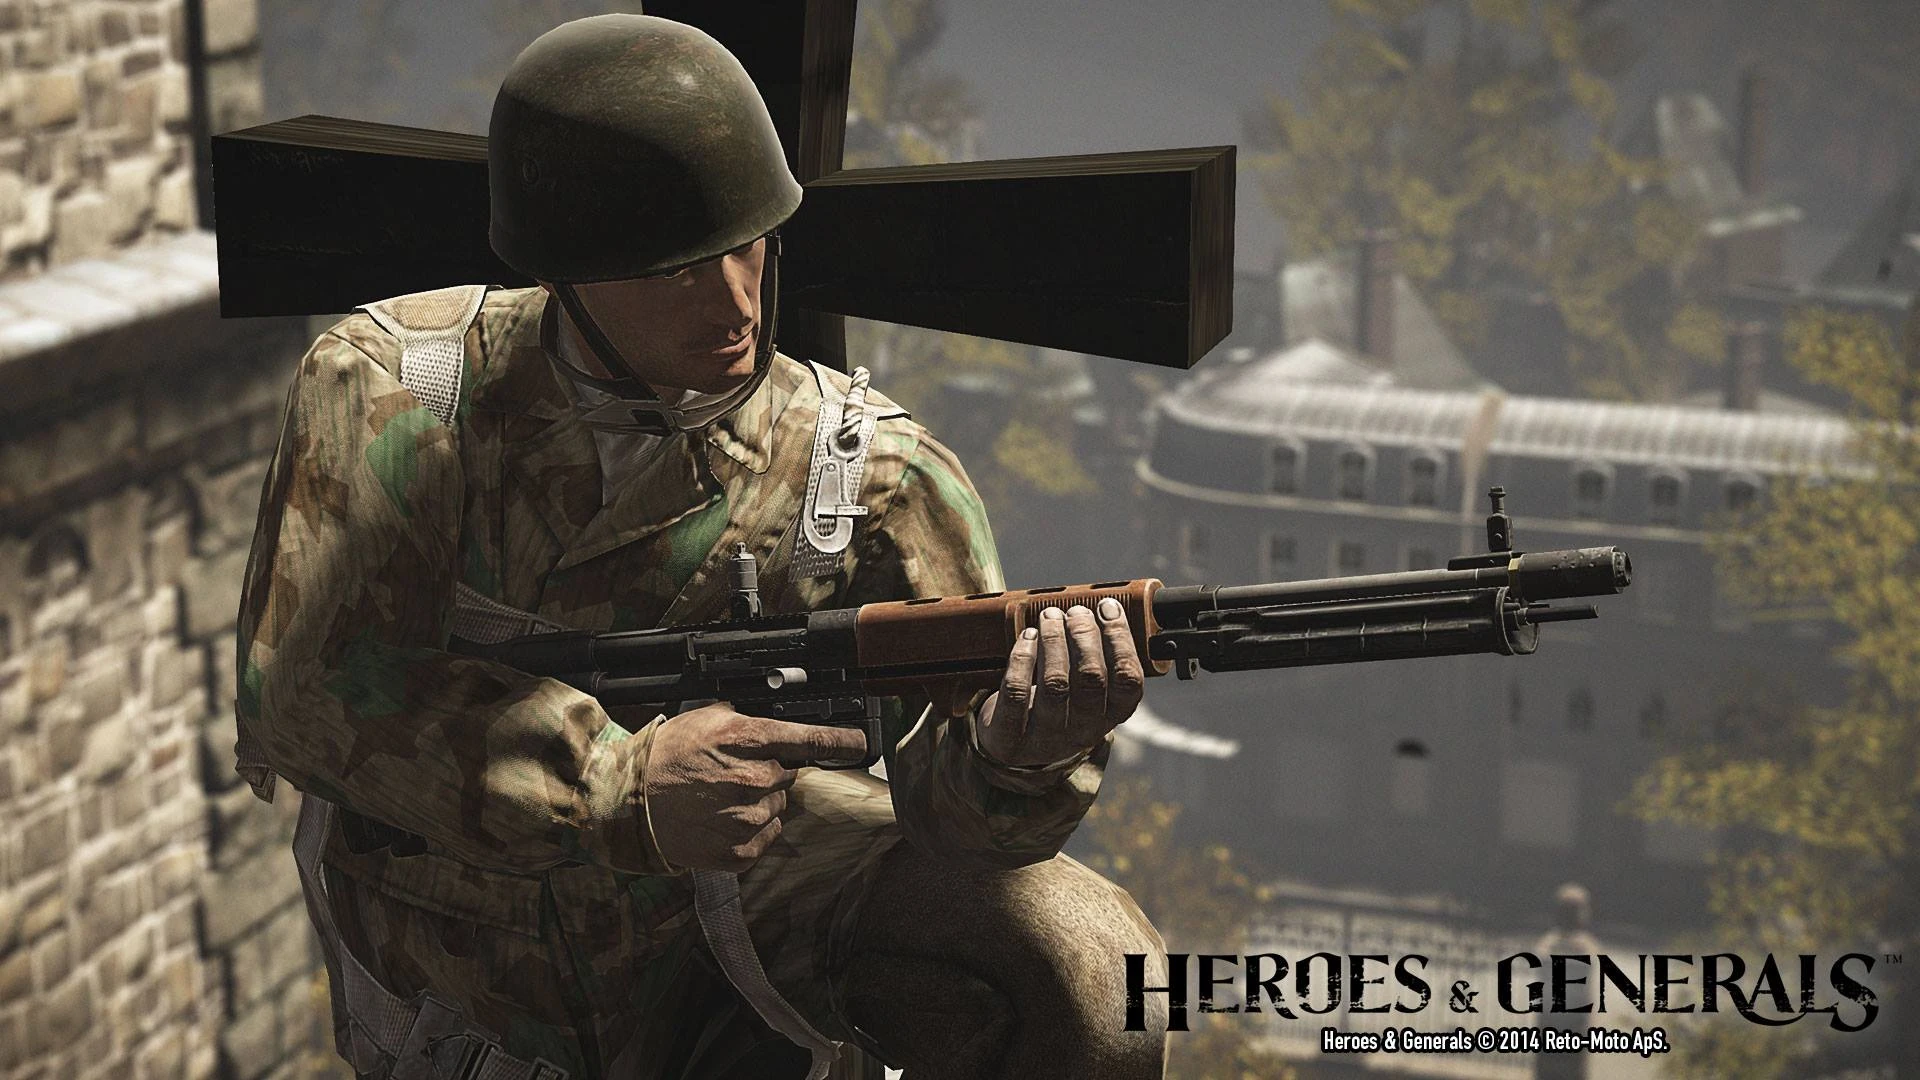
The Fallschirmjägergewehr 42 (or FG42) is a selective fire battle rifle developed by German arms manufacturer Rheinmetall, for use by German Fallschirmjäger paratroopers. It is chambered in the powerful 7.92×57mm Mauser cartridge.
Traditional paratrooper operations of the time required that armament be dropped separate of the troops, and paratroopers needed to locate supply drop crates that were deployed along with them, as their harnesses were incapable of supporting their weaponry on their person. This led to serious complications, most notably an operation in Crete, Greece, where German paratroopers armed with only handguns and frag grenades were unable to recover their supply crates and were subsequently obliterated shortly after landing.
The solution was to create a rifle with the combined attributes of a submachine gun, bolt action rifle, and machine gun, reducing the need to serve multiple firearms to a single unit. It needed to be light enough to be carried by a paratrooper during their drop with all of the necessary ammunition, and the rifle needed to be properly rigged to keep it from falling loose during the drop. The FG42 was the solution. While it performed its role extremely well and was a welcome addition to the Fallschirmjäger's arsenal, some soldier complained that muzzle rise greatly reduced accuracy of the FG42. In its time, the FG42 was considered one of the most modern firearms ever devised. Only 6,397 were ever created between 1942 and the end of the war.[1]
It was also capable of select fire, and unique in that single shot made the receiver a closed bolt, making it more long range and accurate; whereas the full auto functioned as an open bolt. It was also capable of equipping 2.5-3.7x optics which further complimented the single fire bolt; however this was more reserved towards elite paratroopers or earlier users who received the FG42 early in its production when it was more accessible.
Gameplay
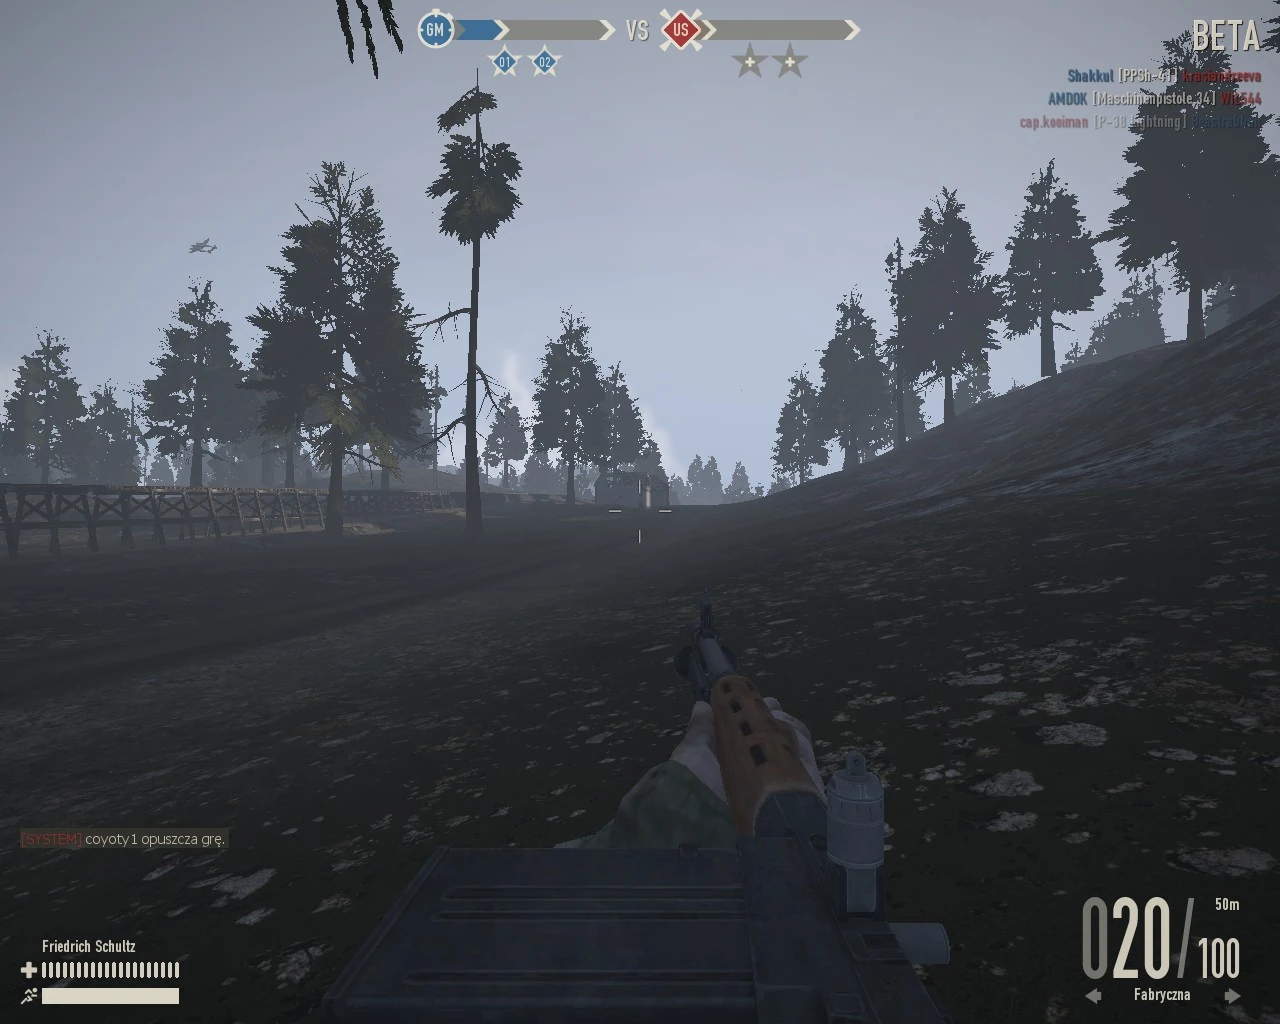
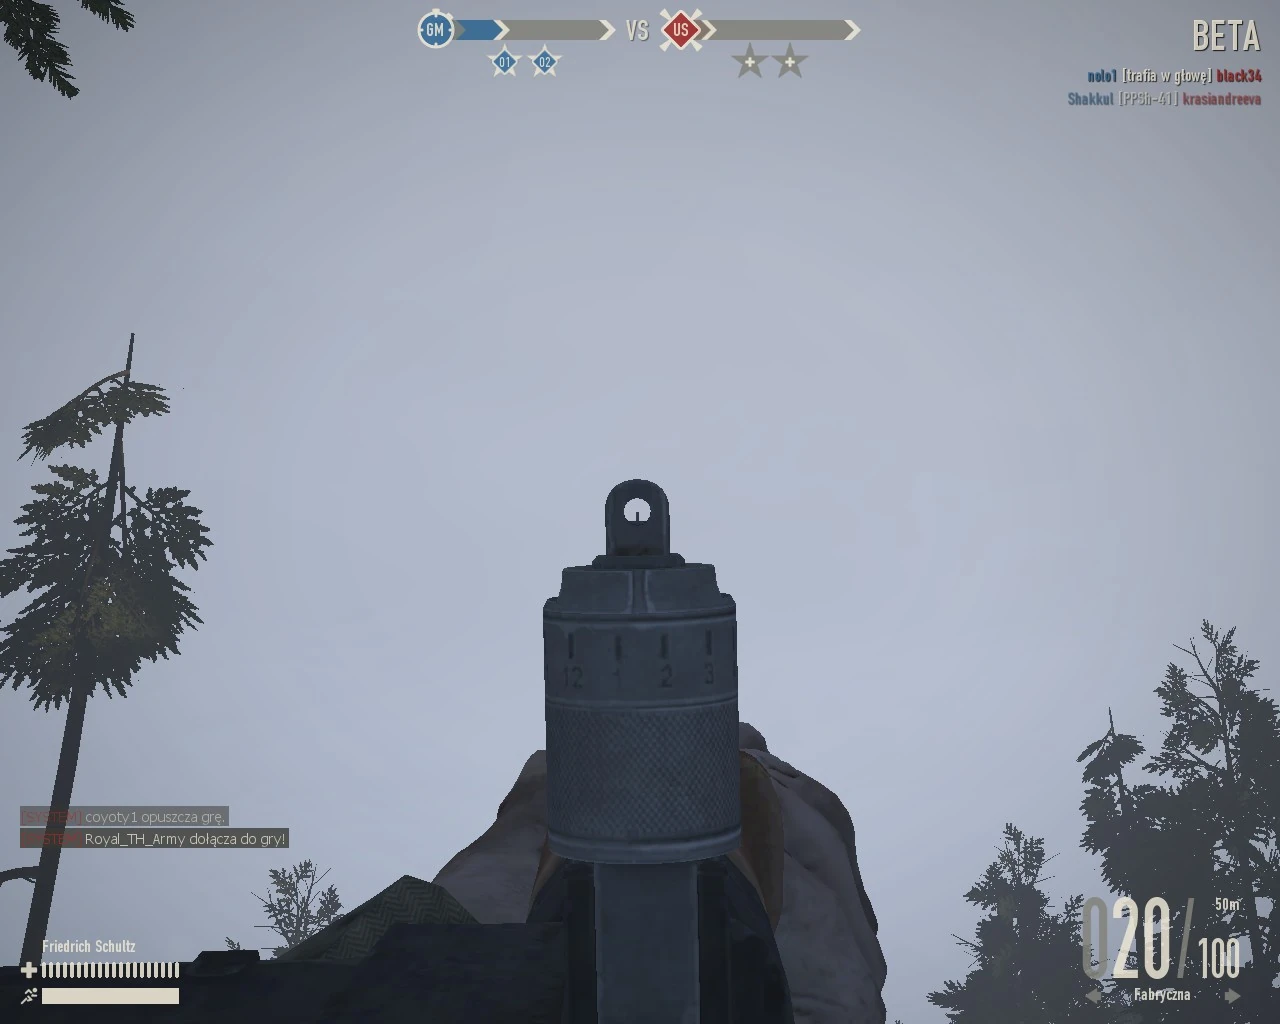
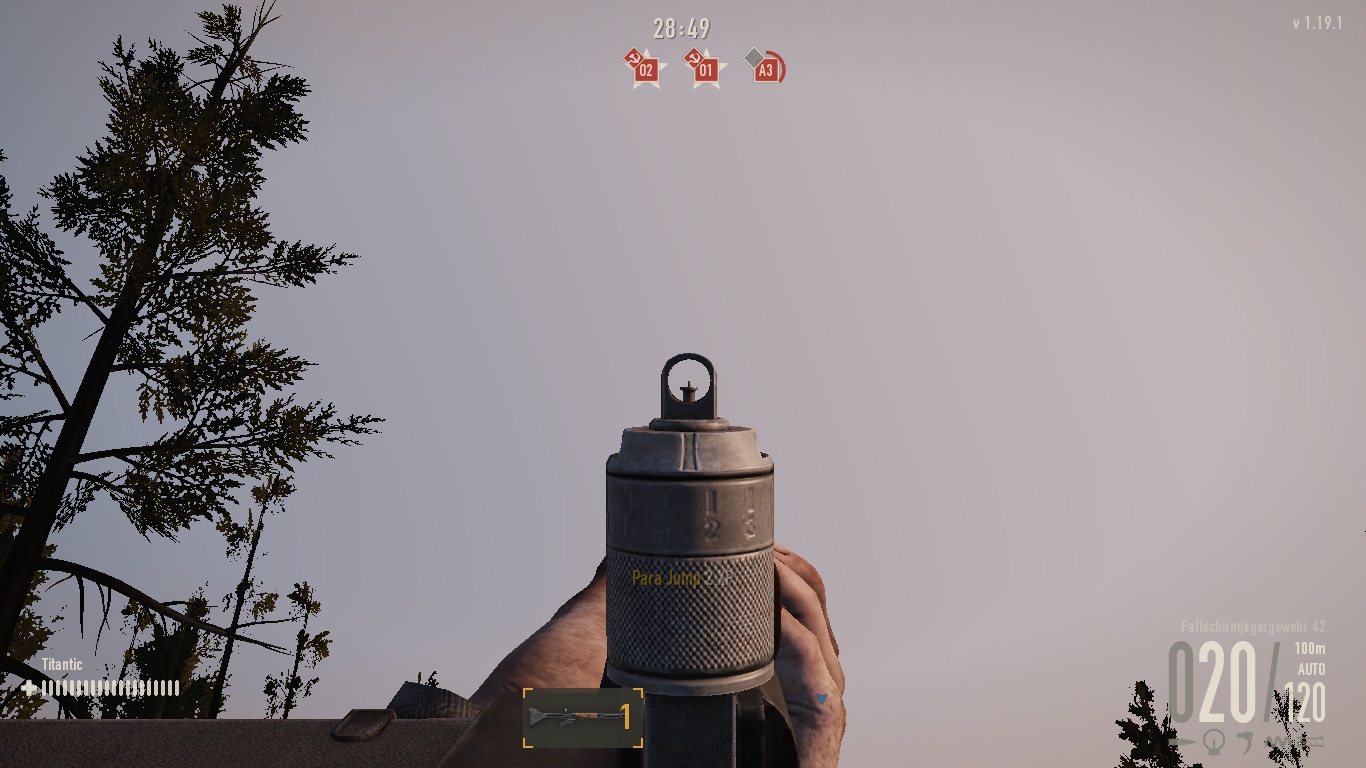
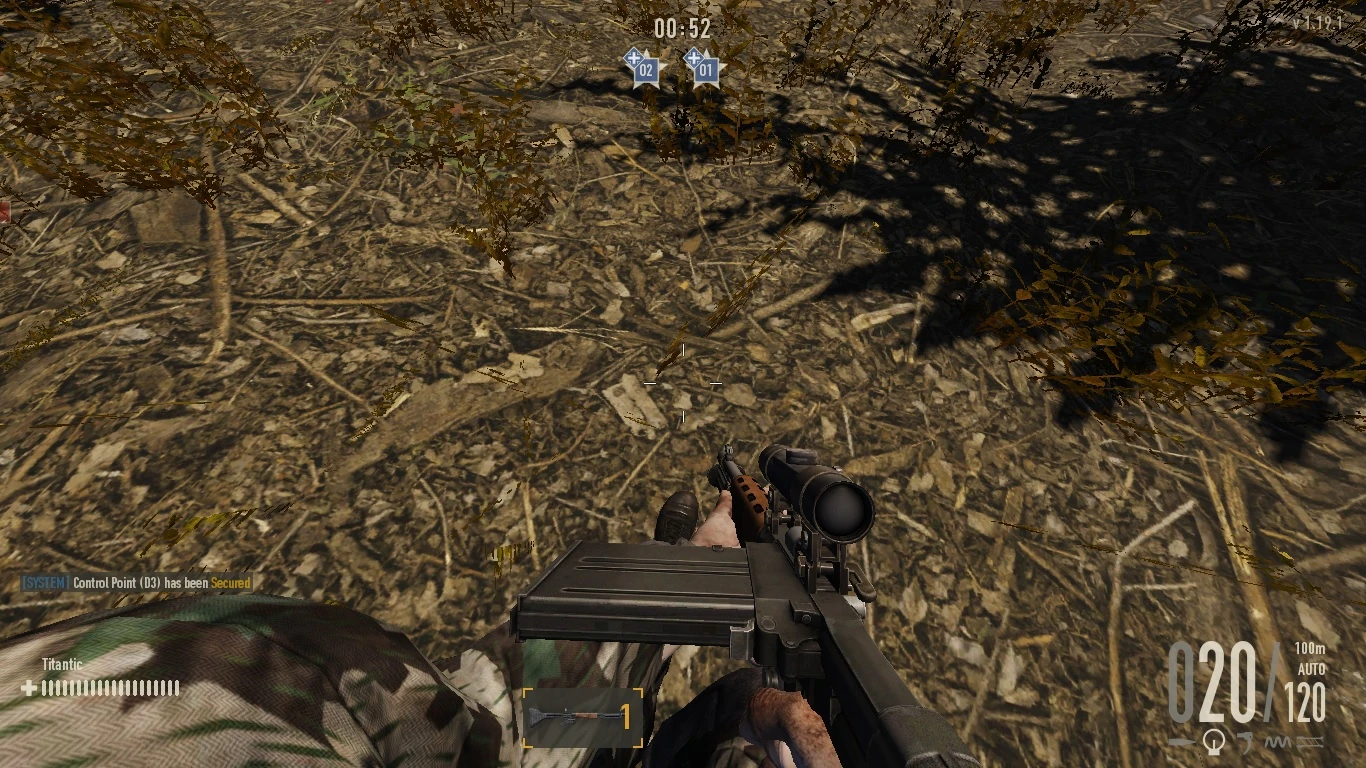
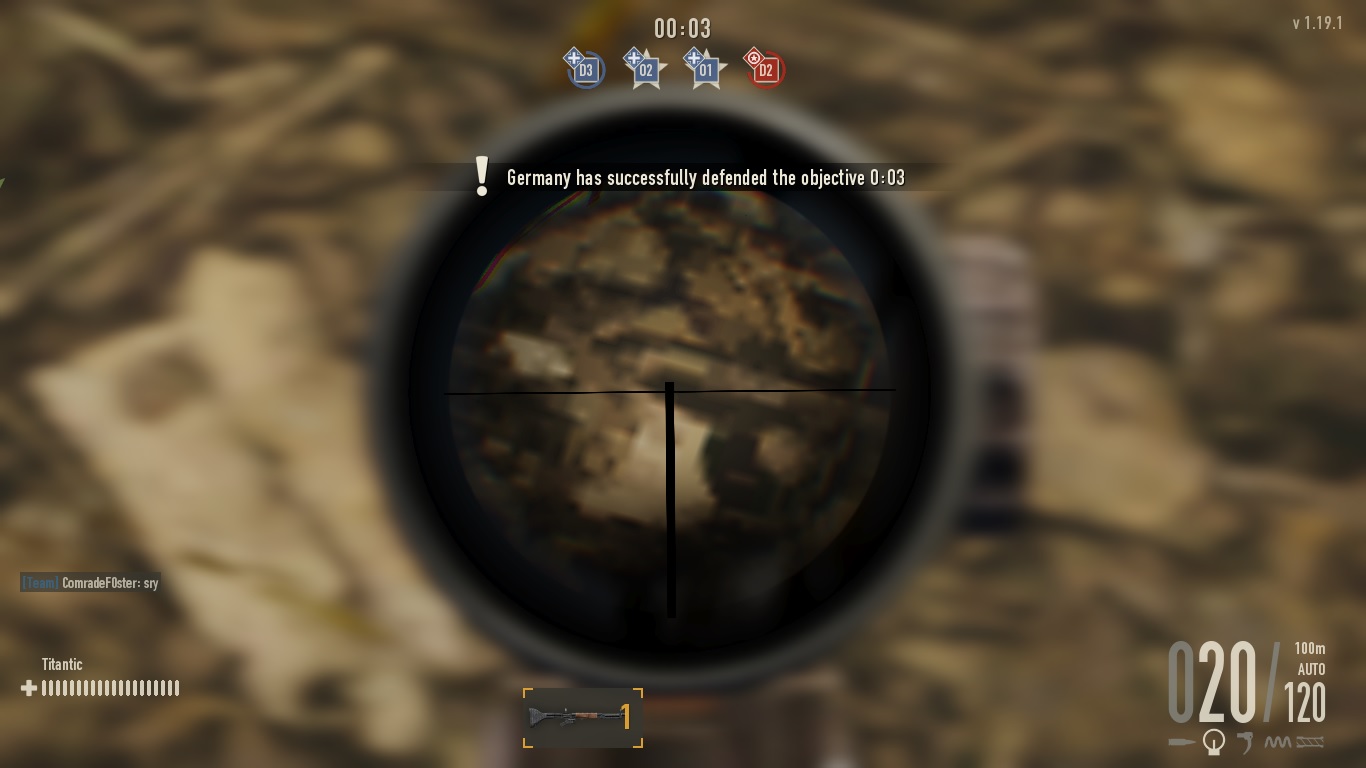
Avaliable for German Paratroopers and German Infantry as a captured weapon. It is a LMG AR hybrid with descent accuracy and is not restricted to only walking when shooting the weapon unlike the standard machineguns with the only exception being the Johnson M1941 LMG. It is the only High caliber fully automatic weapon paratroopers can jump with that is currently in the game. Without modifications FG42 has the lowest rate of fire (ROF) compared to other LMGs and second lowest for submachineguns. This makes it a good fully automatic medium range combat weapon, but equipping only the Fast Trigger (633rpm) will make it have similar ROF to higher tier submachine guns and standard LMGs. It has decent hipfire accuracy. The aimed accuracy are accurate even though the smoke and pinhole sight makes it hard to track targets. It is the only machine gun that can equip a scope.
The weapon is a 3 Hit-Kill to Heavy Set Silver while stock. The Chrome Lined Barrel mod is recommended as it's cheap while offering no downsides. Using at least the s.S Patrone ammunition or the Heavy Bolt combined with Chrome Lined Barrel allows for 3 torso hit-kills for enemies who use Heavy Set Gold.
The weapon's sights are rounded and small thus being obstructive and can easily lead you to losing the target in constant fire, especially due to the muzzle flash from shooting. The sway is almost nonexistant, but the recoil is a bit high compared to SMGs but lower than most LMGs. The entire style of the weapon is to be aggressive, don't be afraid to get in the enemies face. Because this weapon will be an inhumane tool of destruction in the closest combat once upgraded and utilized with skill and experience. One can easily kill enough enemies to run out of ammo with the right use of this weapon.
The reload time is faster than Tier-2 SMG but slower than tier-1.
Tips
The best way to utilize this weapon is by being aggressive. Flank and use cover very often. Open engagements can be the cause of your death with this type of weapon. You will run out of ammo extremely quickly in a firefight, so put cover in between you and the enemy as much as possible. It is best to single shot the weapon in anything past 30m+ as the recoil can be quite difficult to deal with when you first use it. However after learning the recoil pattern and upgrading the accuracy you can (as mentioned) put multiple rounds in burst fire up to 60m and higher with the correct technique.
Try to prioritize targets, kill the best/most dangerous players first in CQC combat. The only matchable close combat weapon is the Johnson when upgraded for RoF. Example for a priority situation: say you land on a roof and walk down the stairs. There are 2 snipers scoping through windows and a rifleman with an M1 Garand also looking through the window. Kill the rifleman first, then the 2 snipers. As the snipers tend to have little reaction time and by the time they realize what has happened, you can put all 3 of them down in bursts. This weapon excels at this play style.
It has low spare ammo (140). Which describes this weapons 'peak, shoot, retreat.' offensive play style. You will find yourself finding an ammo crate, or wishing to die, much sooner than other paratrooper or infantry weapons. Of course, the best option is to pick up a weapon in the heat of combat. Try to avoid making medium to long range shots after reaching your last clip to save on a person in CQC. NEVER use this weapon for suppressive fire like other LMGs or you will run out of ammo faster than a MG42 with one clip and reloading every foot you take.
Surprise, kill, flank, kill more. That's all that needs to be said for the strategy of this firearm.
Ammunition
| S.m.E. 7.92 ball | AMMUNITION | ||
|---|---|---|---|
 |
COST | 340 |
4 |
| COST PER SHOT | 0.17 | ||
| FIELD MAINTENANCE LOAD | 0:00s | ||
| DAMAGE | |||
| RANGE | |||
| PRECISION | |||
| STABILITY | |||
| RATE OF FIRE | |||
| s.S. Patrone | AMMUNITION | ||
|---|---|---|---|
 |
COST | 1,500 |
17 |
| COST PER SHOT | 1.5 | ||
| FIELD MAINTENANCE LOAD | 0:01s | ||
| DAMAGE | |||
| RANGE | |||
| PRECISION | |||
| STABILITY | |||
| RATE OF FIRE | |||
| Anschusspatrone s.S. | AMMUNITION | ||
|---|---|---|---|
 |
COST | 3,200 |
38 |
| COST PER SHOT | 6.4 | ||
| FIELD MAINTENANCE LOAD | 0:15s | ||
| DAMAGE | |||
| RANGE | |||
| PRECISION | |||
| STABILITY | |||
| RATE OF FIRE | |||
| S.m.K.Hart | AMMUNITION | ||
|---|---|---|---|
 |
COST | 2,300 |
27 |
| COST PER SHOT | 2.3 | ||
| FIELD MAINTENANCE LOAD | 0:10s | ||
| DAMAGE | |||
| RANGE | |||
| PRECISION | |||
| STABILITY | |||
| RATE OF FIRE | |||
Specialist Ribbon
| Weapon Required: | Fallschirmjägergewehr 42 | |||||||||||
|---|---|---|---|---|---|---|---|---|---|---|---|---|
 Fallschirmjägergewehr 42 Specialist Fallschirmjägergewehr 42 Specialist
| ||||||||||||
| Using the Fallschirmjägergewehr 42 battle rifle in battle will earn you points on this ribbon. More points are awarded for hitting or killing enemy soldiers. The highest award is given for headshots. | ||||||||||||
| Rank | 1 | 2 | 3 | 4 | 5 | 6 | 7 | 8 | 9 | 10 | 11 | 12 |
| Weapon Required: | Fallschirmjägergewehr 42 | |||||||||||
|---|---|---|---|---|---|---|---|---|---|---|---|---|
| Fallschirmjägergewehr 42 Specialist
| ||||||||||||
| Using the Fallschirmjägergewehr 42 battle rifle in battle will earn you points on this ribbon. More points are awarded for hitting or killing enemy soldiers. The highest award is given for headshots. | ||||||||||||
| Rank | 1 | 2 | 3 | 4 | 5 | 6 | 7 | 8 | 9 | 10 | 11 | 12 |
| Captured Unlocks | ||||||||||||
Modifications
| Default | s.S.Patrone | Anschusspatrone s.S. | S.m.K.Hart | Field Adjusted Sights | ZF-4 (T-Post) | Field Trigger Job | Fast Trigger | Heavy Bolt | Heavy Spring | Lightened Spring | Stainless Steel Barrel | Chrome Lined Barrel | Könich FJ-S | |
|---|---|---|---|---|---|---|---|---|---|---|---|---|---|---|
| Image | 
|

|

|

|

|

|

|
|
||||||
| Cost per shot | 0.17 |
1.5 |
6.4 |
2.3 |
0.72182 |
7.46 |
0.9843 |
0.98 |
0.72182 |
0.63597 |
1.18116 |
0.30108 |
0.45276 |
0.48 |
| Field Maintenance Load | 0:30s (Weapon) | 0:01s | 0:15s | 0:10s | 0:03s | 0:15s | 0:03s | 0:06s | 0:02s | 0:02s | 0:02s | 0:02s | 0:03s | 0:08s |
| Damage Near | 35 | 38 | 40 | 42 | 36 | 37 | ||||||||
| Damage Far | 28 | 29 | 32 | 26 | ||||||||||
| Near Range | 51.2 | 62.4 | 84.8 | 40.8 | 56.32 | 47.1 | 56.32 | 56.32 | ||||||
| Far Range | 368 | 393.3 | 448.5 | 287.5 | 404.8 | 312.8 | 404.8 | 441.6 | ||||||
| Velocity | 766.8 | 766.8 | 766.8 | 766.8 | ||||||||||
| Conefire | 0.41 | 0.451 | 0.328 | 0.492 | ||||||||||
| Sway Stand Mode | 1.76 | 1.584 | 1.584 | 1.672 | ||||||||||
| Sway Crouch Mode | 1.36 | 1.224 | 1.224 | 1.224 | ||||||||||
| Sway Prone Mode | 0.66 | 0.594 | 0.594 | 0.561 | ||||||||||
| Sway Aim Modifier | 0.3 | 0.27 | 0.27 | 0.276 | ||||||||||
| Cone Contraction Per Sec | 1 | 1.1 | 1.1 | 1.07 | ||||||||||
| Camera Recoil Up | 1.25 | 1.875 | 1.875 | 2.5 | 1.3375 | 1.35 | 1.375 | 1.125 | 1.275 | |||||
| Camera Recoil Right | 0.3 | 0.45 | 0.45 | 0.6 | 0.321 | 0.312 | 0.33 | 0.27 | ||||||
| Camera Recoil Variance | 0.1 | 0.15 | 0.15 | 0.2 | 0.107 | 0.106 | 0.11 | 0.09 | ||||||
| Rate of Fire | 550 | 591.4 | 611.12 | 500 | 500 | 591.4 | 523.81 |
Trivia
The weapon is a type E model, which means it is the faster-firing brother of the type G but at reduced range with 900rpm. However in game, it is closer to the type G in terms of stats. With a slower ROF and damage going out to 200 meters before hitting its minimum.
In-game, you can only carry 140 rounds total. With 20 being the first clip making your spare ammo at 120. However in reality the German paratroops were able to carry up to 160 rounds of ammo for this weapon with a specifically designed Bandoliers. Equaling out to 8 clips spare. With 20 already in the firearm, making the standard ammo carry amount settle at 180 rounds.
Gallery
- FG42

References